Wearable Toile: Stripey Measure Twice / Cut Once Darcy Boxer Shorts
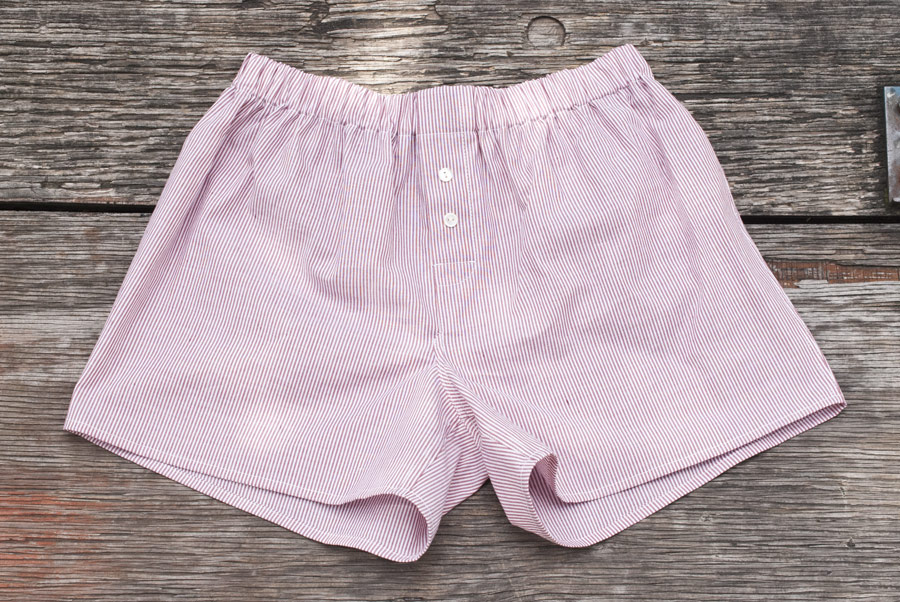
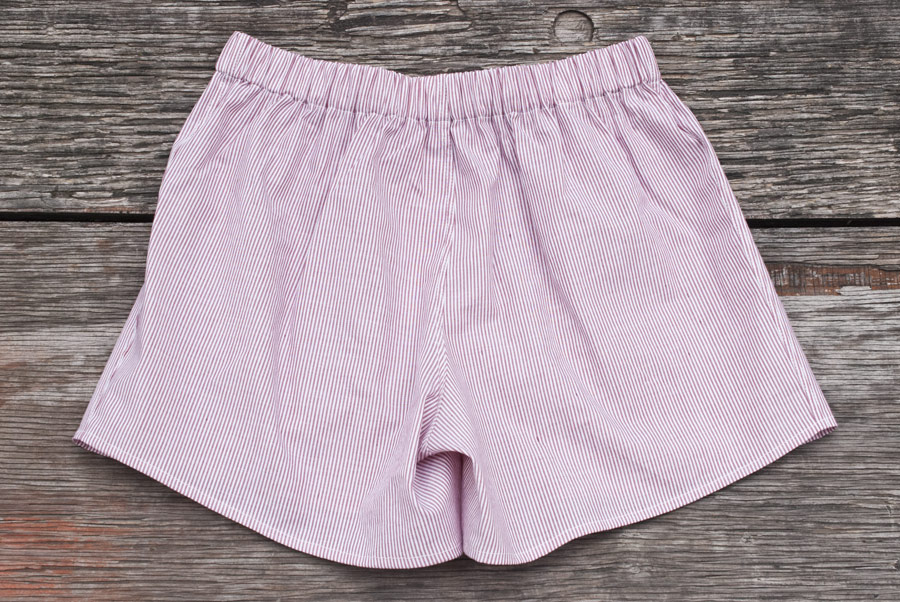
Well, I’ve made a pair of boxer shorts for my boyfriend. I was initially going to make summer pyjamas for myself and made a quick toile of the pattern in the size closest to my own measurements. Then the weather turned and that project got put onto the back burner; but since I had already made a toile and it happened to fit my boyfriend pretty well too, I decided to make a pair or two for him. (I thought that it would be a quick project. I was wrong.)

Pattern
These are the free Measure Twice / Cut Once Darcy Boxer Shorts, in a size S/10.
Fabric
The fabric is another piece of cheap striped cotton from Müller. I’d love to make them in crazy fabrics with crocodiles or robots on them, but first I’ll have to make sure my boyfriend likes the fit.

Adjustments
-
I added 3.5cm to the top of the pattern pieces so I could sew a tunnel for the elastic rather than just sewing the elastic to the top. My boyfriend is not a fan of exposed elastic, all of his boxers have fabric-covered elastic (which, I am told, is rare in men’s boxers, but is his preference anyway).
-
I slimmed the legs down by about 2cm at the side seams. They stuck out at a weird angle on my boyfriend in the toile, and they’re much better like this. The toile looks fine on me, but that’s because I have more of a derrière and thus the fabric gets pulled toward the back more, which doesn’t happen on him.
-
I straightened the curve of the in-seam. I don’t really remember why I did this, I think it was just for ease of sewing.
-
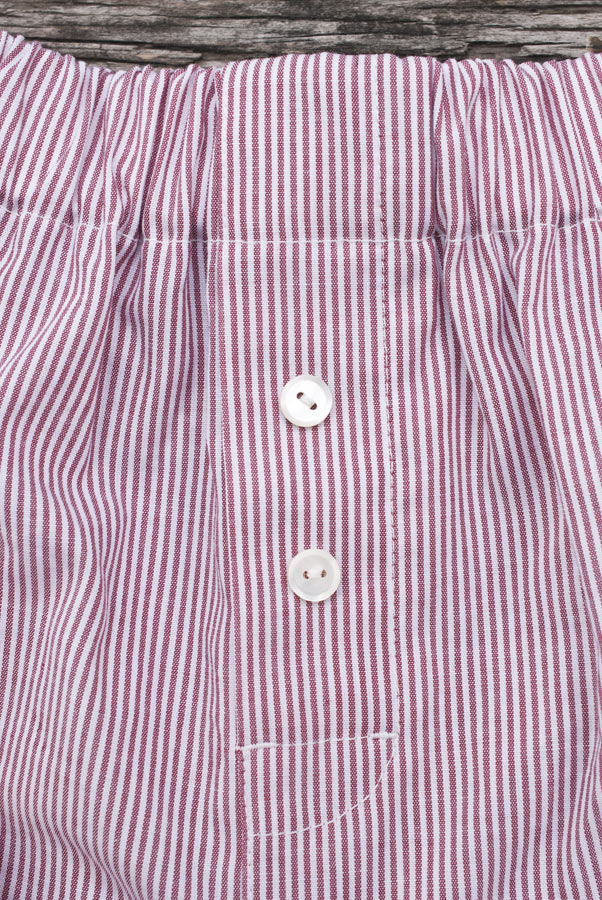
I asked my boyfriend whether he wanted a fully functional fly, a fake fly that looks like it’s functional but isn’t, or no fly at all. He doesn’t care for the function, just the look, so I stitched the buttons on through all layers. I didn’t feel like sewing buttonholes that would never be used anyway.
Construction techniques
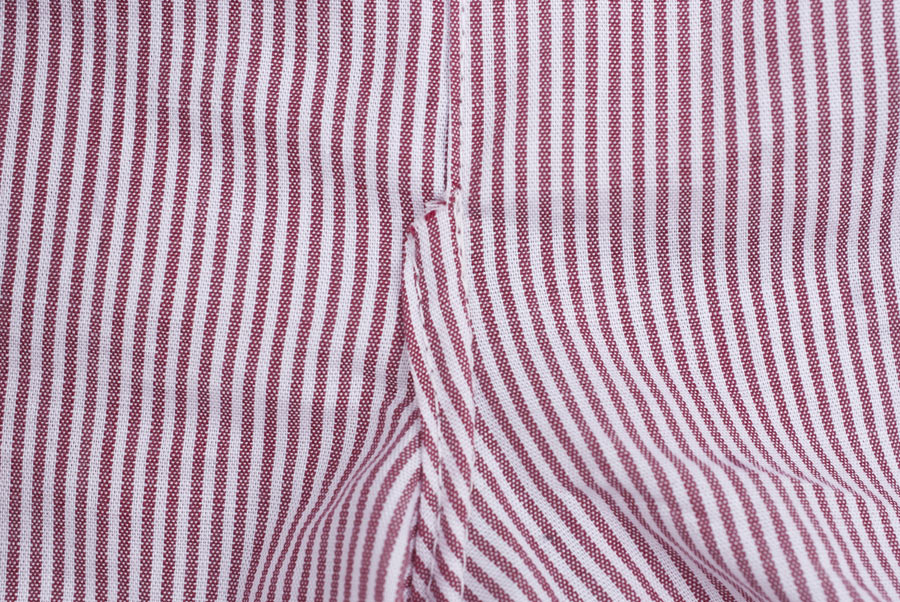
- I tried to flat-fell all major seams, which led to the main issue with this pair: I had no idea how to properly finish the front crotch seam below the fly, and the result is ugly.

- Having said this, I’m pretty happy with the fly itself, for which I followed the pattern instructions and then added bar tacks for reinforcement. (Which is ridiculous, since the fly can’t be opened, but it looked wrong to me without them.)

What I want to do differently next time
-
I need to solve the issue with the front crotch, obviously. I think that I’ll have to flat-fell the seams on the inside rather than the outside, make sure I turn them in the right direction, and probably change up the construction order. I have since researched the whole thing some more and read through Peter’s sew-along posts (see below) and I already have some ideas for how to fix this issue.
-
Next time, I’ll edgestitch the whole fly edge. That’s how it’s done on my boyfriend’s ready-to-wear boxers and I prefer that look.
-
I’ve been considering cutting the waistband as a separate piece rather than just adding the extra length at the top of the front and back pattern pieces. But this is how it’s done on my boyfriend’s ready-to-wear boxers, so I’m not sure I’ll bother with changing it. I definitely won’t on any future stripey or plaid pairs!
-
My boyfriend has tried them on and he says that they feel different from his other boxers somehow, but he can’t quite say how or why. I’ll have him wear them for a full day or two and then ask again whether he wants any fit adjustments on the next pair.
-
I don’t like the 1cm seam allowances. They make the flat-felled seams hard to sew, and I also prefer the look of slightly wider flat-felled seams. So if my boyfriend likes these, I’ll probably adjust the pattern to have the standard 1.5cm seam allowances, at least where I want to sew flat-felled seams.
Helpful links
I haven’t used the below links for this pair, but am noting them down here for future reference.