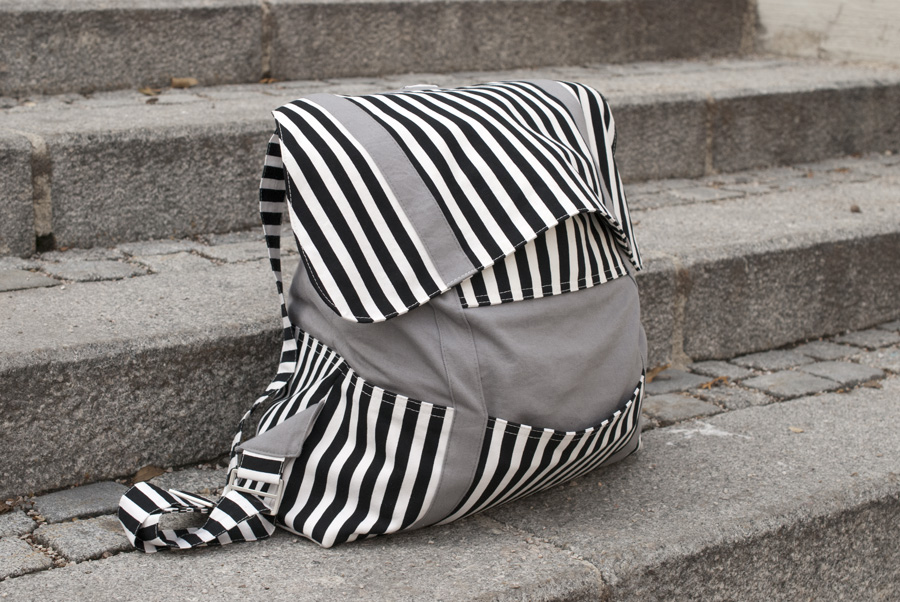
Finished: Colette (Walden) Cooper Backpack
Wheeee! I’ve made a backpack!
Pattern
Colette Patterns (Walden) Cooper. I made Version 2, the backpack.
Fabrics and Notions
-
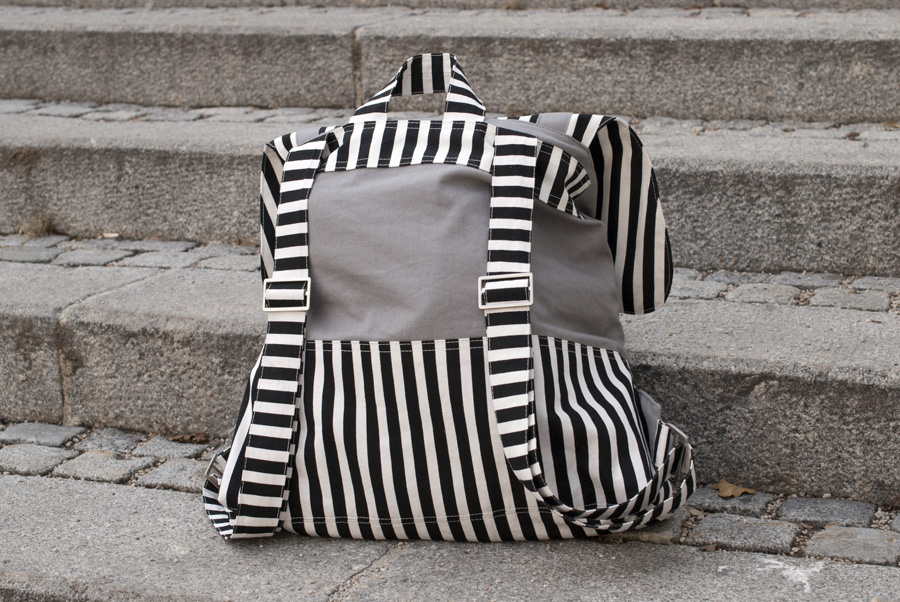
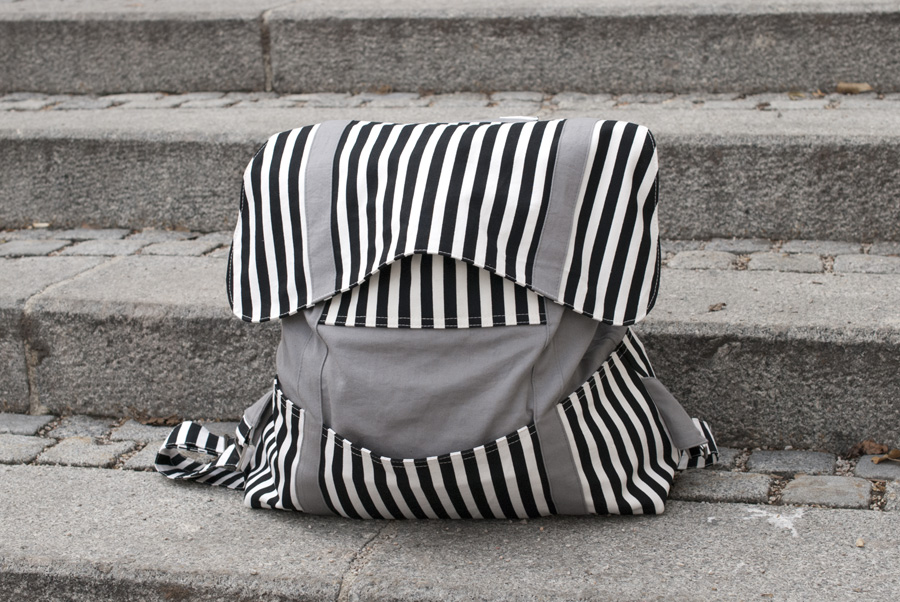
Light grey cotton gabardine, from Komolka, for the main fabric. It is a lovely fabric and I want to make a pair of trousers from it now!
-
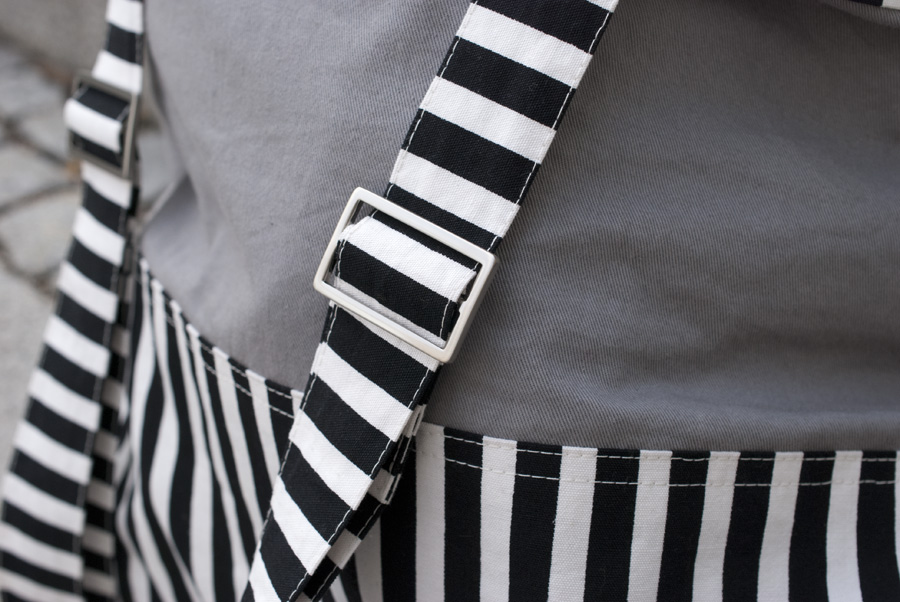
My trusty black and white IKEA SOFIA for the contrast fabric.
-
Black IKEA DITTE for the lining.
-
Purple waterproof nylon, from UK Fabrics Online, to underline the lining fabric. I figured that protection against light rain wouldn’t hurt, and since that purple turned out to be a terribly ugly colour, I wanted to use it where I wouldn’t see it.
-
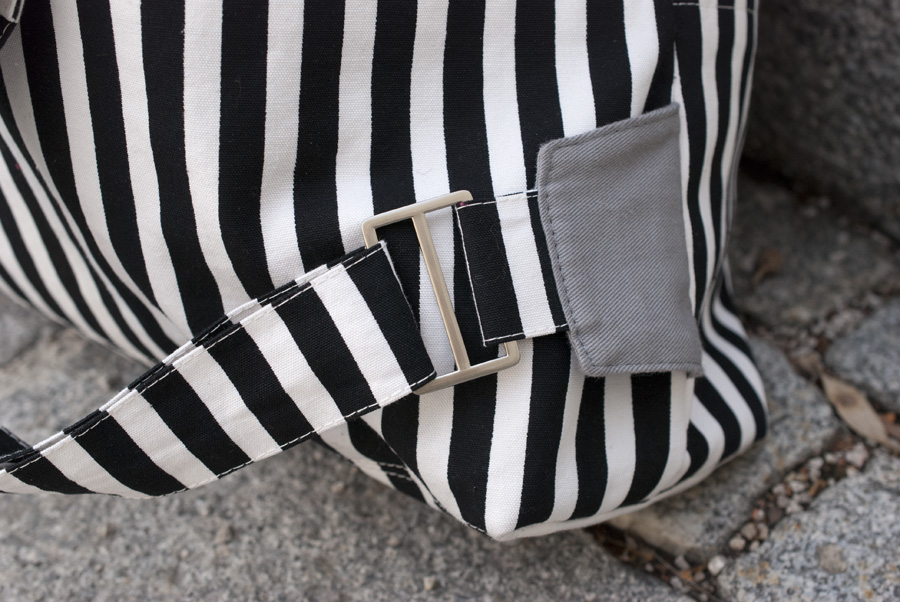
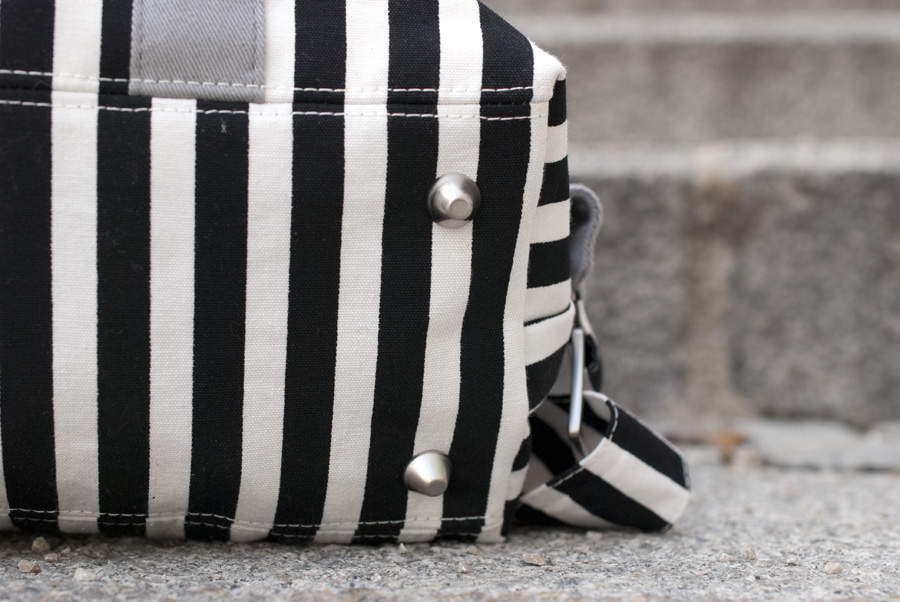
I got the sliders, magnetic snaps and bag feet from the 3dpatternpaper Etsy store, and I cannot recommend them enough. The hardware I’ve ordered from them is great quality at a very low price, and the customer service is awesome. The owner even went to the trouble of finding brushed silver rivets for me to match the sliders, magnetic snaps and bag feet. I usually prefer to buy things like that locally and I really tried, but couldn’t find what I needed, so I’m very grateful to the lovely Dan for sending me the supplies from Hong Kong. They will last me for another few bags.
Adjustments
- I slightly changed which pattern pieces were cut from the main and which from the contrast fabric.
-
I underlined the lining fabric for extra sturdiness and rain protection.
-
I made fabric straps instead of using webbing.
- I added little bag feet because I thought that they might help protect the bottom of the backpack (and they’re cute!).
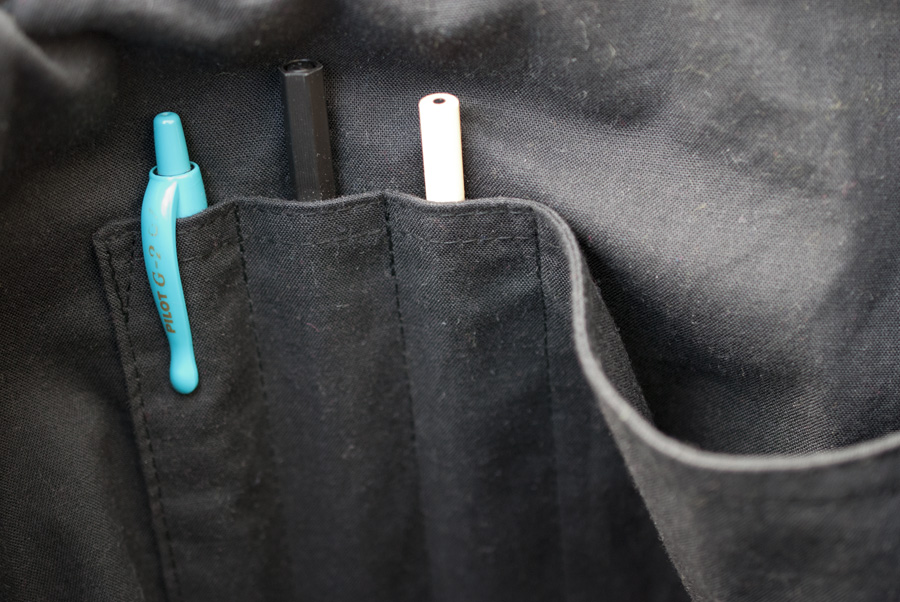
- I didn’t divide both of the internal pockets in two, but instead made three pen/pencil compartments in one of them and left the pocket next to them a little larger.
-
I added some extra lines of top-stitching for a more uniform look, e.g. along the bottom edge of the back top panel.
-
I haven’t yet installed the rivets. I haven’t quite decided whether I really want them.
What I struggled with
Nothing, really. The pattern drafting and instructions are excellent, particularly since there’s a sew-along as well. I was rather suspicious of the “beginner” skill level, but this bag truly looks much fancier than it is to construct. (Which is a good thing, obviously. I feel like a pro because I’ve made such a neat backpack, but really it wasn’t hard.)
It did take me quite a while, it required some patience and fiddling and there are some places where the thing got a little bulkier than I liked, but all in all there was nothing that I couldn’t deal with just by taking my time and being as accurate as I could (including quite some hand-basting).
What I want to do differently next time
I’m not sure there will be a next time, but if the backpack proves useful, I might eventually want to replace it—or possibly make one for someone else. So in either of those cases …
-
I would try marking the stitching line on the inner flap piece a little smaller than on the outer one to help the seam line roll to the inside (as you would do for a shirt collar or something like that). It gets top-stitched down, so you can massage it to lie nicely, but in my case, the inner piece ended up a little wavy because of this.
-
I would probably put the lining together before the exterior bag. Technically, it doesn’t make any difference, but psychologically, I think it did for me. Assembling the boring black lining bag after having stitched together all of the intricate exterior pieces—with hardware installation and bonus stripe-matching—just made me really impatient. I think that it would have tried my patience less if I had done it the other way around.
Helpful links
- Colette Patterns Cooper Sew-Along – Updated January 25, 2014, to link to Colette’s new sew-along site instead of the individual tutorials on the Coletterie
- Craft Apple: Installing a Magnetic Snap – I followed this tutorial rather than the Colette one because the method looked like it would yield a sturdier result. I didn’t only interface the fabric, but added another little scrap of fabric behind the interfacing for extra stability.