Pattern Testing: Seamstress Erin Designs Presidio Purse
Oh, look! My first experience as a pattern tester!
Preliminary notes
When Erin asked for testers for her first sewing pattern, there wasn’t even any photo or drawing of the bag—nor a lot of info about it, other than that it was going to be an “oversized purse”. Even so, I was intrigued. I’ve been intimidated by the idea of testing a pattern so far because that usually means sewing something to a terribly tight deadline, and I’m still really, really slow. There’s no way I could sew a coat in two weeks! A bag, however, I thought that I could do, so I offered my help—and was chosen as a tester for the Presidio Purse. Yay!
When I printed out the pattern, I was rather surprised by its size. The main pattern piece was about 50cm × 50cm! They call something as huge as that a “purse” over there?! (I’m still wondering whether that’s a British vs. American English thing.)
When I went out to take a few quick pictures of the finished bag for Erin, I just grabbed some random things to put into it in order to make it look less empty. (This was on the day of the deadline, and it was below freezing, which isn’t fun if you can’t use your camera with gloves on, so I really had to be quick.) I should have taken some more things, I guess, since the Presidio still looked almost empty! The following picture shows the contents of the bag as photographed in this post:
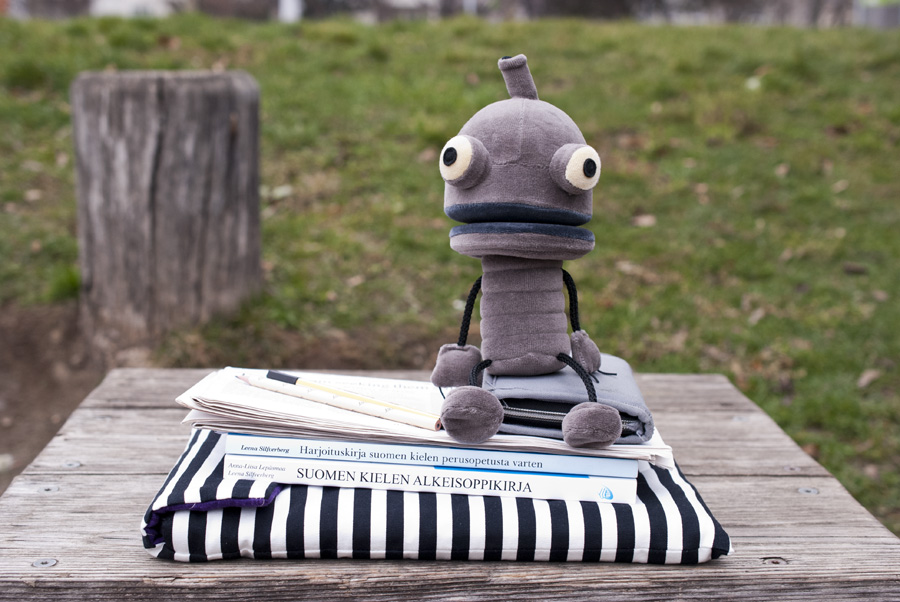
That’s my 13-inch MacBook Air in its (matching!) padded sleeve, two textbooks, a magazine, a pen and a pencil, my ratty old wallet (gotta replace that thing already!), and Josef. This bag really holds a ton of stuff!
Erin said that she “welcome[d] all feedback, especially critique”. I ended up sending her an 11-page PDF with tons of persnickety little notes. I still sincerely hope she really meant that bit about “welcoming all feedback”! (;
Pattern
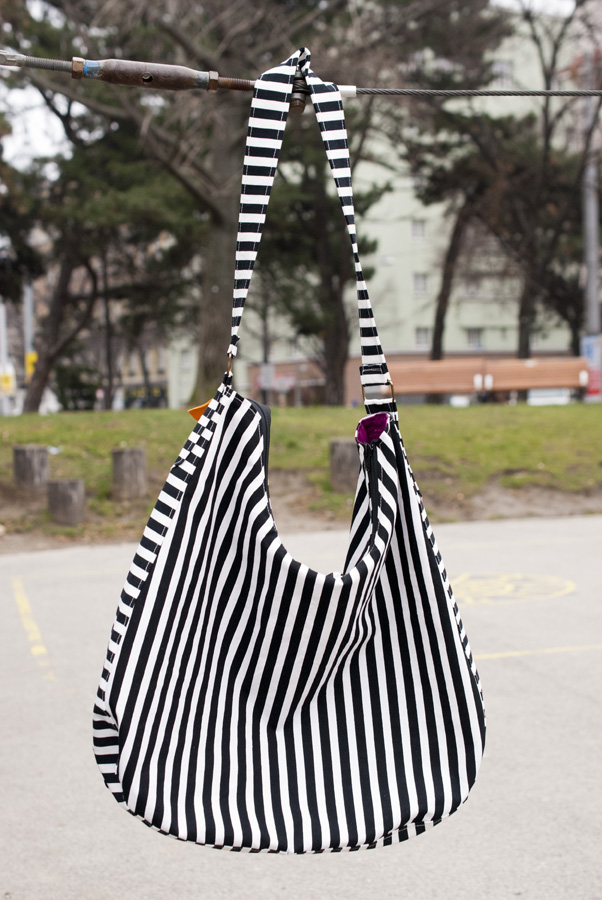
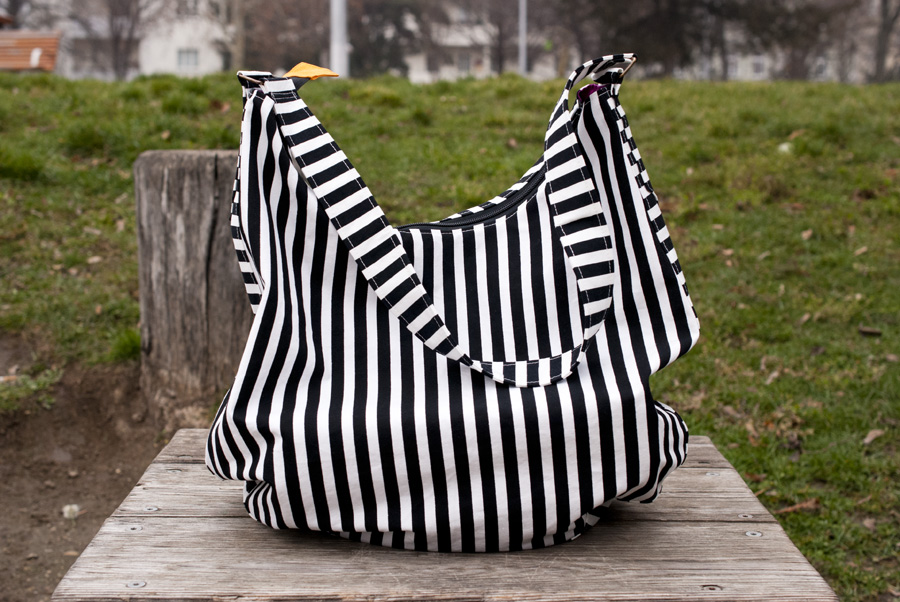
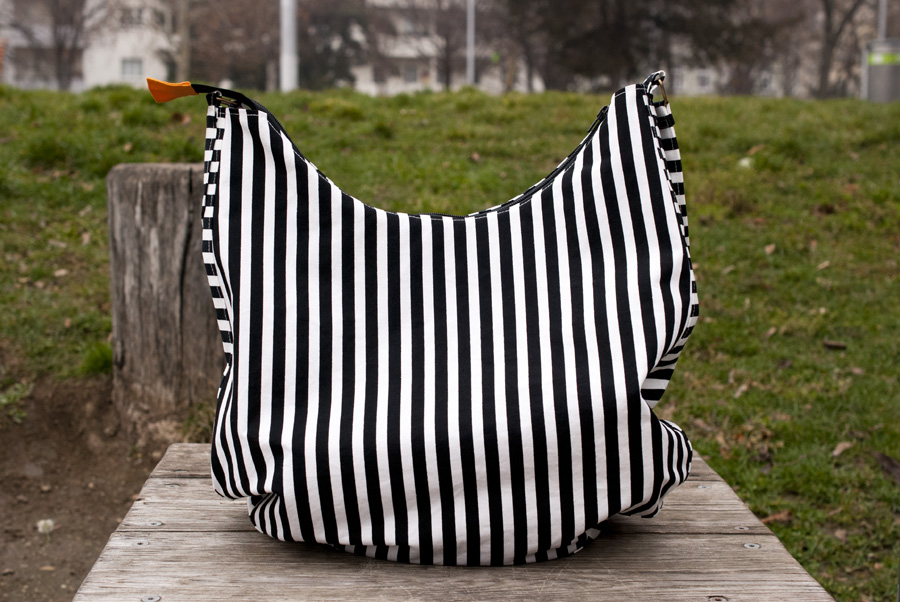
A test version of Seamstress Erin’s Presidio Purse. I made what is now called View A (with rectangular rings), but omitting the front insets (see below).
Fabrics and Notions
-
I was really unsure of which fabrics to use, so I decided upon my “tried and true” bag fabric for the exterior: IKEA SOFIA upholstery cotton. I had used it before for several other bags and pouches (including my laptop sleeve). It’s easy to sew, reasonably easy to press, and it’s always popular with everyone. Yes, that meant matching stripes. On a pattern I hadn’t sewn before, and sewing to a deadline. So what?… Gotta love a good challenge!
-
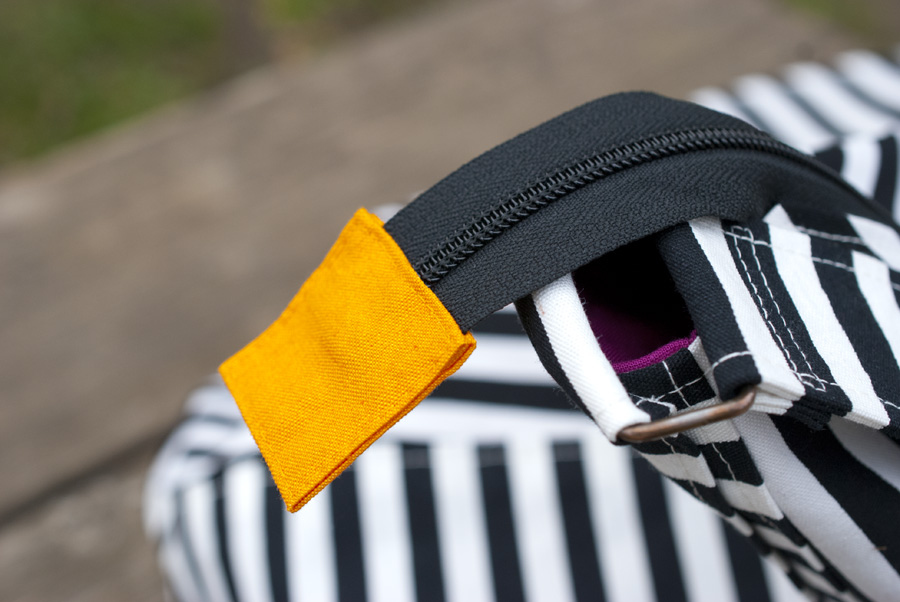
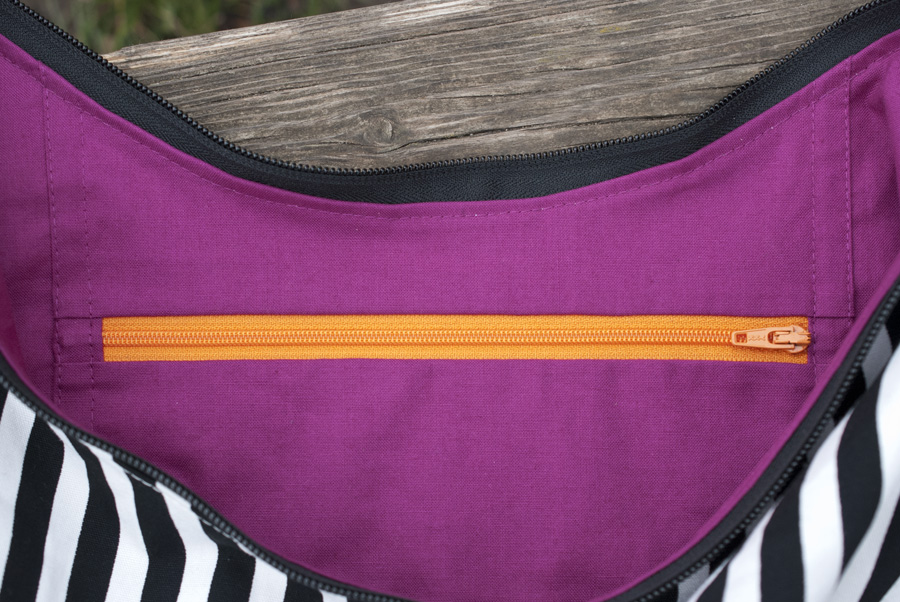
I used a lighter-weight, cheap purple cotton fabric for the lining. I had originally bought it for a blouse or dress and only realised later that it was too coarse and stiff and would most probably not be comfortable to wear. I still really like the colour, so it was perfect for this purpose.
-
I really wanted to make the version with the rectangular rings because it just looks so much nicer, but I couldn’t find the right size of rectangular ring locally. (Did I mention the deadline? So no ordering supplies from overseas!) I complained about this to my mum, and she gave me a box of all kinds of hardware from her stash. It contained some (vintage) rectangular rings (with sliders that I removed), but since they weren’t exactly the right size, I had to adjust the pattern a bit.
-
I used a scrap of another IKEA upholstery fabric for the zip tab. It matches the contrast zip I used for the zip pocket inside.
Adjustments
I really tried hard to stick to the pattern and instructions as closely as I could—since I was supposed to test the pattern, not my own creativity. I couldn’t help changing a few minor things anyway, however.
- As mentioned above, I didn’t have the correct size of rectangular rings, so I had to make the handle anchors and handle a little narrower.
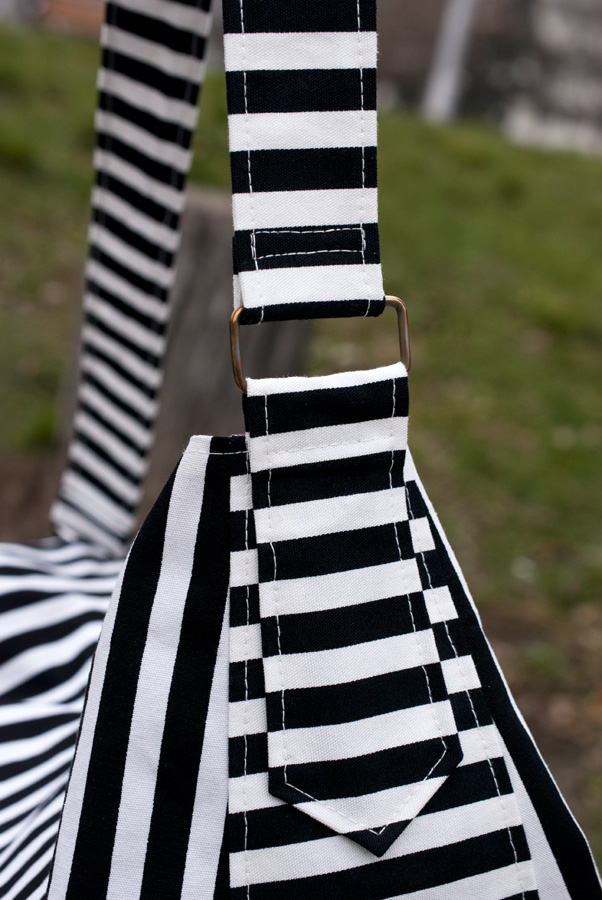
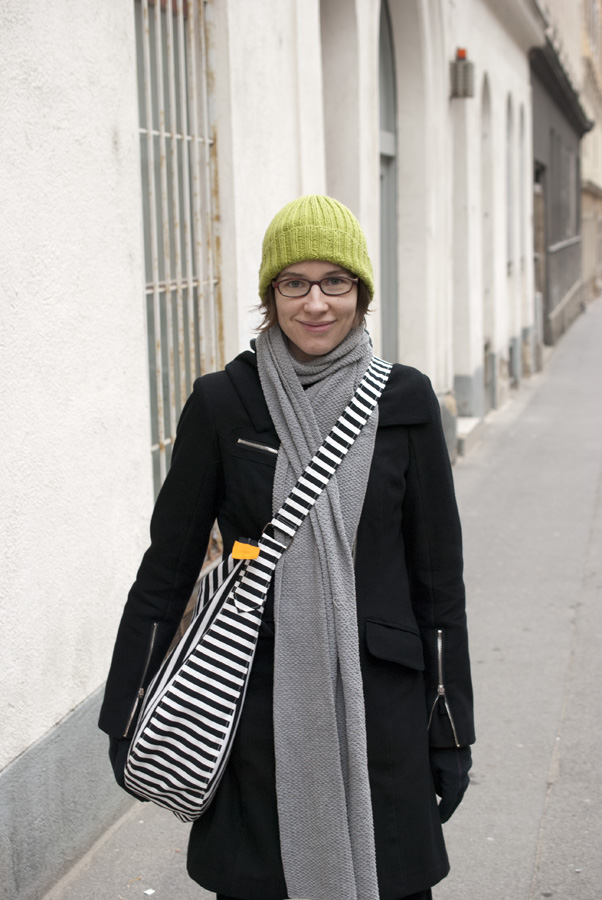
- Since I had to change the handle already, I decided to make it a lot longer as well. I am most likely to wear this purse slung across my body, so I really need a longer handle (read: strap) to make that practical. I considered making an adjustable strap, but decided against it in order to be able to finish the purse on time.
- I really didn’t think that the front insets (the test version only had the gathered ones) would work with my (too heavy to gather, and striped) exterior fabric, so I left them off and just cut the front piece exactly like the back piece.
- The instructions have you edge-stitch the pockets onto the lining, leaving raw edges inside. I really didn’t like that, so I sewed a second line of top-stitching around the pockets to enclose the raw edges.
What I struggled with
-
The zip insertion. I found the instructions for inserting the large zip somewhat confusing, and I’m still not sure whether I’ve done it correctly. It looks okay, but I might not have inserted it according to the instructions. Erin says she has improved the instructions for this step in the final version, and she will do a sew-along soon, so I hope things will be clearer then. (Funnily enough, I had a similar issue with the top zip end on the Sewaholic Minoru jacket. I seem to be zip-challenged.)
-
The top-stitching isn’t my best. (Which is even worse when you work with a striped fabric.) I had to work on my boyfriend’s mum’s machine and it just doesn’t like top-stitching (or straight, neat stitching in general), so there was nothing much I could do. Oh well.
What I want to do differently next time
-
I want to make a scaled-down handbag version! I really like the shape of the bag, but it isn’t all that practical for my body and lifestyle. If I have to carry anything heavy, I really prefer a backpack so that the weight is distributed more evenly. And if I just need the essentials, the Presidio is way too big. So I’m thinking of hacking the pattern and making a smaller version.
-
There are still raw edges around the zip on the inside of the large pocket, and yes, they’re fraying. I’ll have to do something about this on my next version, maybe bind them in voile or a similar light-weight fabric. I might still neaten the edges by hand-blanket-stitching around them even on this bag.
-
I don’t really like that the handle/anchor is sewn through both the exterior and the lining fabrics (and thus there is visible stitching on the lining), so I would probably try to do this differently the next time. It doesn’t look bad, I used thread in the bobbin that matches the lining, but I would still prefer not to see that stitching at all from the inside.
Photo of me taken by my boyfriend.