Wearable Toile: Modified Burda 2/2013, #103
[This post was updated on November 4, 2014, to include some pretty photos from my sister’s vacation.]
A while ago, my sister approached me about making a summer dress for her. She had a pretty specific idea of what she wanted and had spent some time looking for a ready-to-wear dress to match her idea. She had tried on several dresses in different shops, some of them rather expensive boutiques, and she liked different features of different dresses, but she didn’t really like any single dress overall. So she figured that since her sister sewed, she could probably get something much closer to her idea by having it custom-made just for her.
One of the ready-to-wear dresses, which we even went back to try on again in the store so I could see it on her, had a kind of circle around the neck, with the front and back pieces attached to it. She really liked that, so we decided to copy that part. But that same dress was made of two different fabrics for the bodice and the skirt, with a waist seam, which she didn’t like. And it was way too short on her and made her look completely out of proportion. Another dress that she had tried on in a boutique close to where she worked had a lovely maxi length, but the fabric was 100% polyester, which is a really bad idea for a dress you’re planning to wear in the summer heat. And I think that she tried on several more, all of which were wrong somehow.

So, enter the sister who sews—and after several discussions, a few hours of searching for a similar pattern online, some drafting and fiddling and some executive decisions about what would hopefully work on my sister, I had a pattern that I thought might be pretty close to what she wanted. So I proceeded to make up a (hopefully wearable) toile for her to try on and specify whatever she might want changed for the final dress.
Pattern
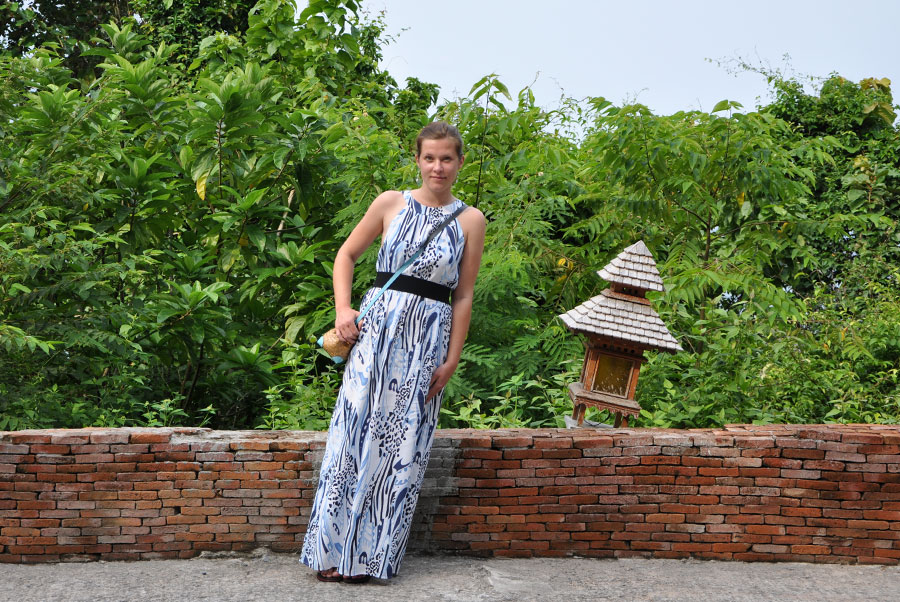
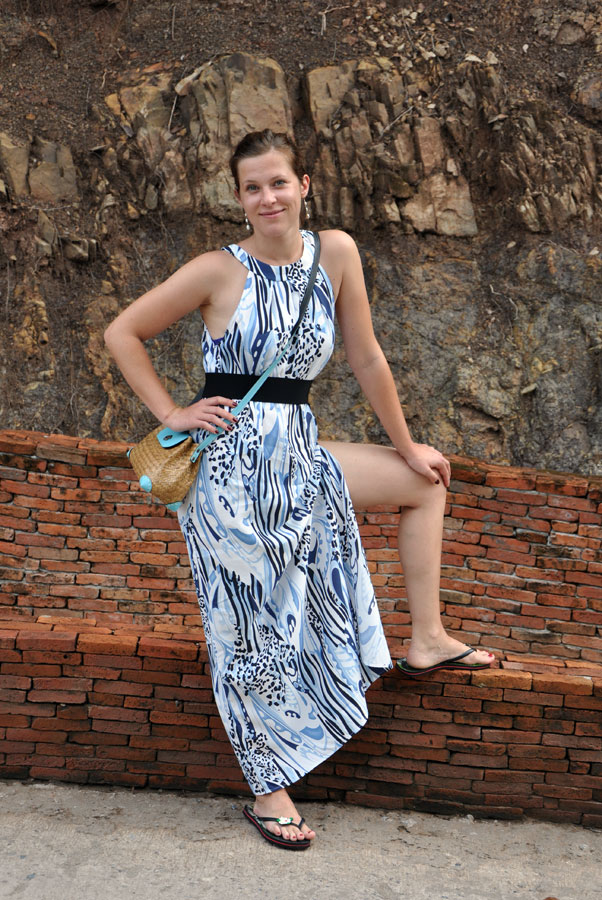
I started off with Burda 2/2013, #103, a “halter dress”.
Fabric
Since the fashion fabric of the final dress is going to be a medium-weight, drapey 100% viscose fabric, I wanted something similar for my toile. I found this fabric at Müller. It has the same hand as the final fabric and was labelled as 100% viscose as well. Serendipity! It’s usually impossible to find anything specific at Müller, so I was delighted with my find—even though I was not the hugest fan of the crazy print. My sister actually likes it, however, so I decided to try and make a wearable toile rather than just a quick fitting toile, and she’s quite happy with the result. Her boyfriend even prefers the toile over the final dress.
Adjustments
-
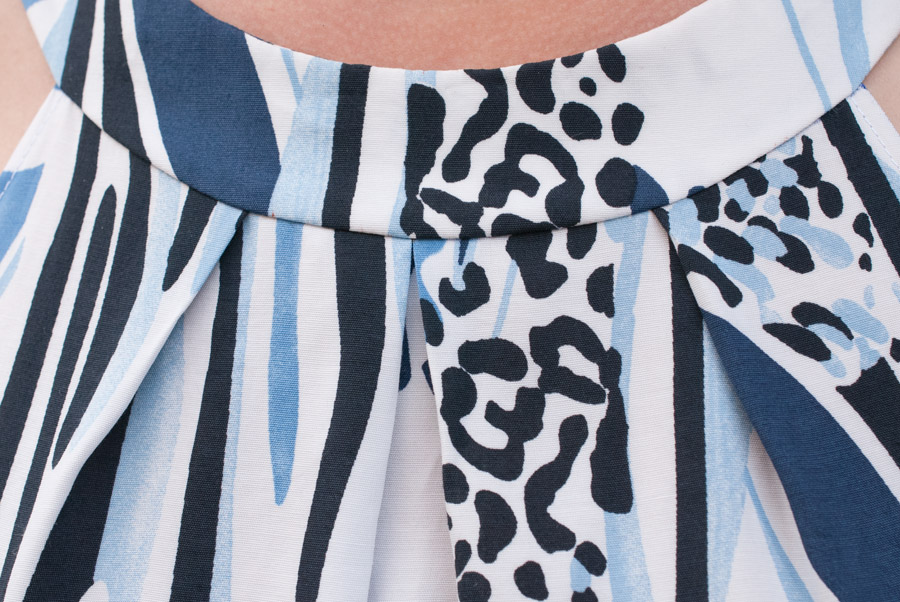
I used the front and back pieces of the Burda pattern, but drafted the circle around the neck from scratch. And by “drafting” I mean trying to copy the ready-to-wear inspiration dress and fiddling with the pattern piece until it looked okay.
-
I cut about 3cm off the top of the front and back pattern pieces to account for the circle piece, which is wider than Burda’s neck band.
-
I pleated the neckline instead of gathering it. I just like pleats better (both sewing them and the look) and I talked my sister into liking them better as well.
-
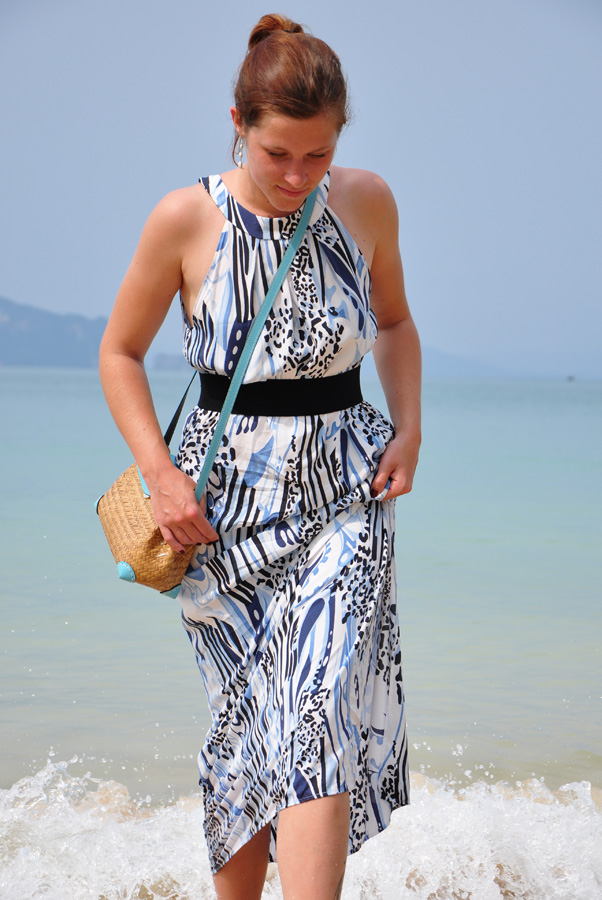
I lengthened the dress to a maxi length. The pattern PDF actually includes Burda 2/2013, #104, a maxi dress, in addition to the shorter halter dress, but I didn’t feel like printing and taping together the full-length pattern pieces, so I basically just printed the bodice part and then lengthened the lines to maxi length.
-
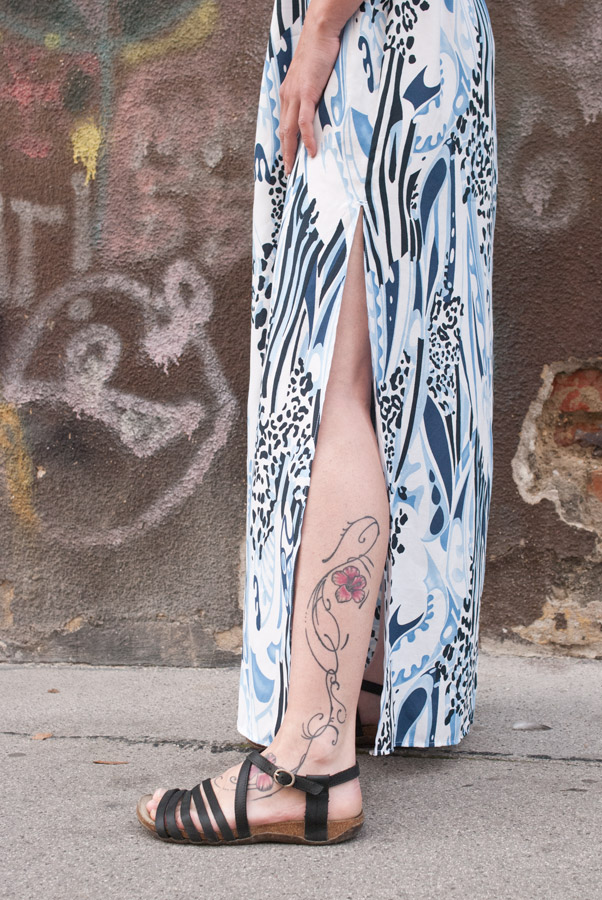
I added a split to the left side of the dress because maxi dresses are just so much better with a split on one leg. I made sure to ask my sister which leg she has her tattoo on so that the split would show that off.
What I want to do differently next time
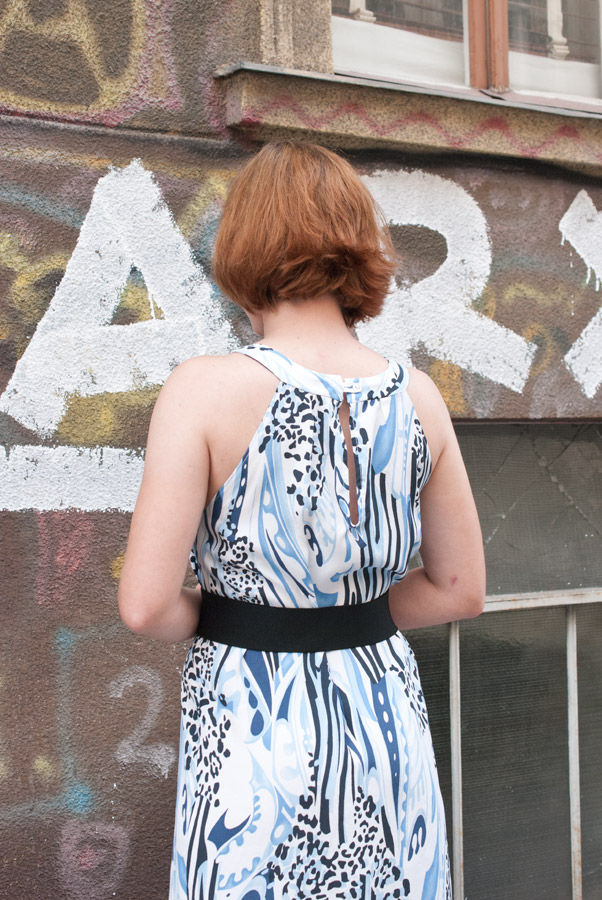
- I tried Burda’s method for sewing the back neckline slash on this version, but the result isn’t pretty. For the second version, I need to figure out a better way of finishing the slash. Also, I’ll shorten the slash by about 1.5cm, I think, to make sure my sister’s bra doesn’t show even when she moves.
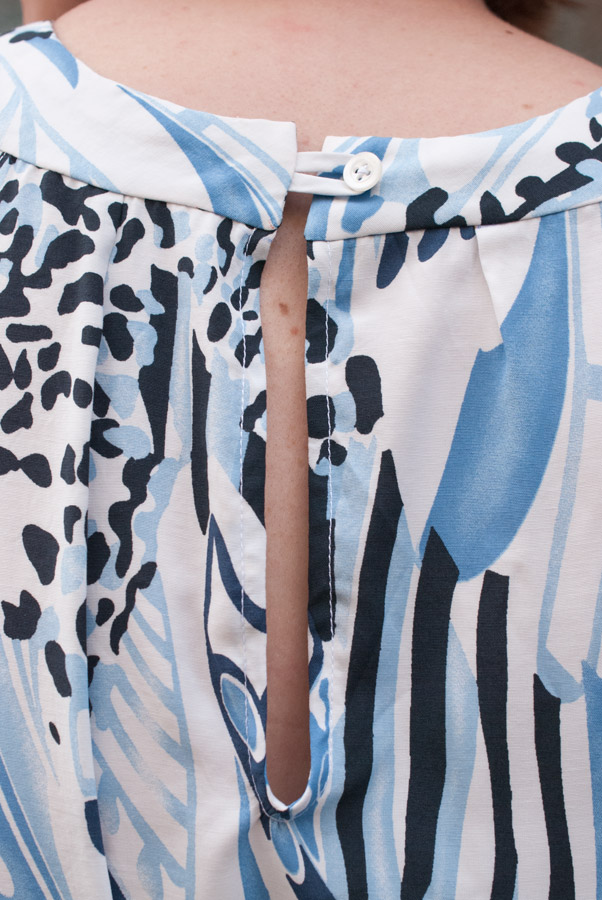
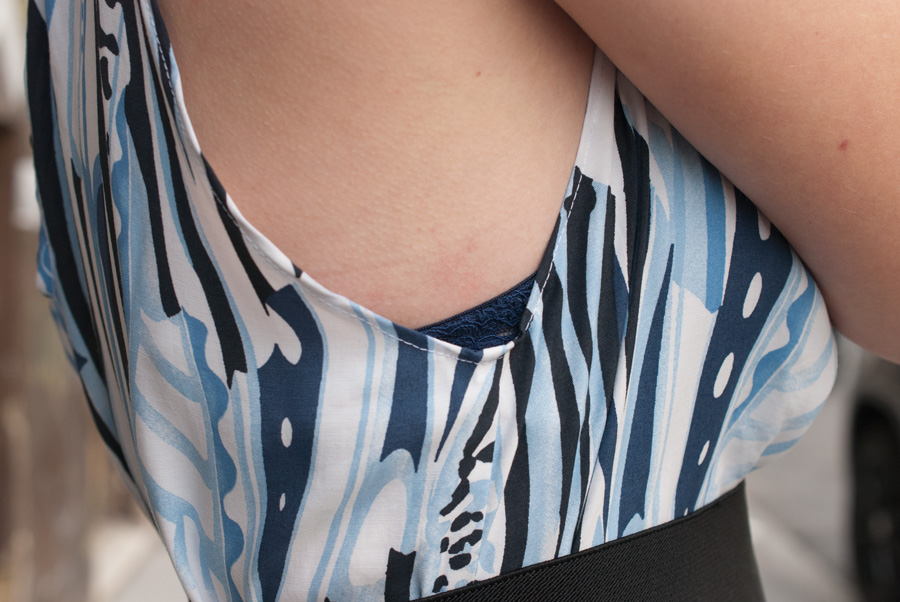
- The armholes are really low. They need to be raised by about 4cm for the final dress, which will make them still nice-for-ventilation-in-the-heat-low, but no longer bra-showing-low.
-
Uhm. I don’t know how this happened, but for some reason, I messed up the front pleats and they aren’t symmetrical. By far. I have shown the dress to several people and no-one has commented on this yet, so I guess it isn’t that obvious if you don’t look for it specifically, but I’m rather embarrassed about it anyway.
-
The final version is going to have a lot more hand-sewing than this toile. I knew that hand-sewing some parts of the dress would be prettier, but I didn’t want to spend the time on the toile. On the final dress, I am going to invisibly slip-stitch the armhole edges, the side split and the hem. I am also planning to sew the back slash so the stitching can’t be seen from the right side. It’s going to be the most elegant garment I’ve made so far, with no visible stitching anywhere!
Photos of my sister in Thailand taken by her boyfriend.